|
|
An afterschool program featuring: Three Dimensional Modeling and Design Using SolidWorks *** Private School ***, Yakima |
|
Initially the students were introduced to a couple of assemblies that were modeled in SolidWorks. These assemblies were loaded on each computer so that the students could get some hands on experience playing with simulations and motion. The first were the "Bevel Gears" which were a set of gears set at 90 degrees from each other and assembled on a mounting bracket. The gears were mated in such a manner so that they could only rotate about their center axis. This simple machine allowed students to turn a handle on one gear in order to move the other one. A "motor" was also placed on one of the gears with settings that could be changed. This was also demonstrated to and manipulated by the class. Click on the image below for a link to an eDrawing assembly of this model including the animation:  The other assembly was the "Sarrus Mechanism" another machine that translates circular motion into linear motion about a vertical axis. This too had a motor on it. Click on the image below for a link to an eDrawing assembly of this model including the animation: 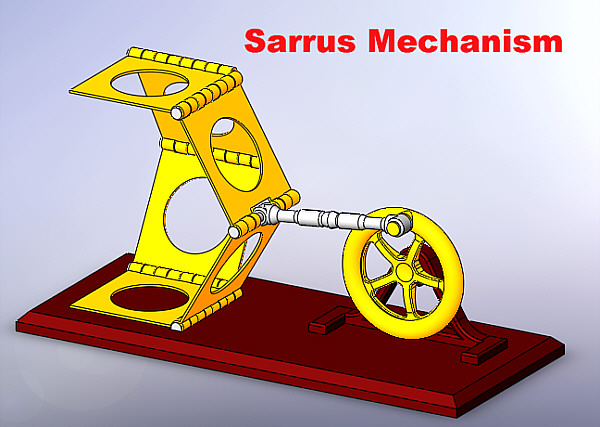 Both machines were popular and demonstrated to the class just a few of the many capabilities that SolidWorks provides. A slide show was then shown showing many models that were designed in SolidWorks including buildings, heavy machinery, architectural elements, consumer products, photo real renderings and 3D printing. The next item we covered in class was a hands on freeform demonstration where students were introduced to and played with a number of new 3D tools including "Extrude Boss/Base", "Extrude Cut", "Shell" and "Fillet". This part of the class allowed for the actual building of a SolidWorks part. We started the model as shown
in next weeks section below, which we will try to finish next week.
We covered a number of things in class last Wednesday. For the benefit of some students who could not make the first class and as a refresher for the returning students we performed another freeform model exercise. In this exercise we revisited last week's functions plus had an introduction to the draft tool. The draft sub-command to the "Extrude Boss Base" and the "Extrude Cut" allows for the creation of cones and funnel type objects. We also visited the "Fillet" feature which puts rounds and fillets with specific radii on sharp corners. We then took this freeform
model and saved it on the students' personal thumb drive both in the SolidWorks
and the eDrawings format. The eDrawings format allow the students
to reopen and explore their work at home once this free viewer is loaded
on a computer. Please see the link below for the website with download
information: eDrawings
Viewer
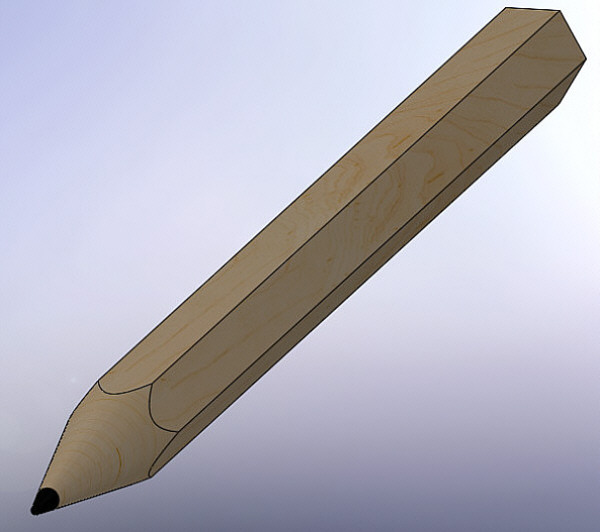
Class Summary: We covered a number of things in class last Wednesday. Our main feature was the modeling of a pencil showing a number sketching and 3D feature techniques. We will finish this up in our next class with a couple different file formats sent home on the thumb drive for home viewing.
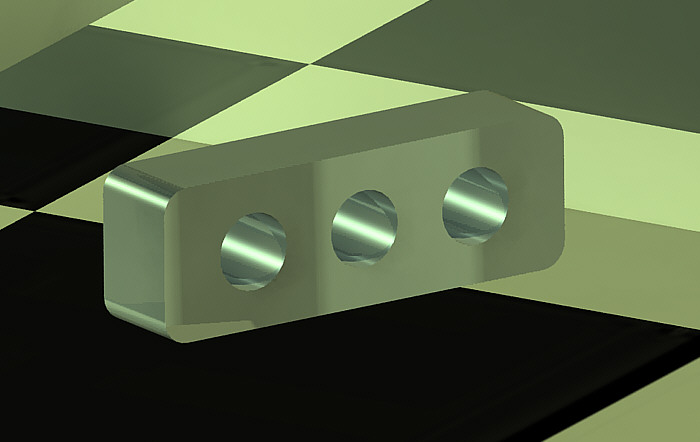
This was a much smoother class with most students following the step by step handout for the modeling of the pencil. Of course most needed help at some point during the class and it is very helpful having some of the students who had finished their design taking the time to help some of the other students in the class. We finished the pencil and gave the students an opportunity to print out their creation on the class printer. They also saved an image of the pencil as a jpg image file and as an eDrawing file on their thumb drives. Please look for these when they get home. If you have not done so please download the eDrawings viewer at the link below: After the pencil, we finished the class by starting the Connection Block. We will finish this next week and hopefully import this into a drawing format showing the 3 primary and an isometric view as shown below. For the balance of the quarter each class will feature the construction of different models showing different modeling techniques that eventually may be applied to a student designed project. This format will consist of demonstrations, as we have done the past couple of classes plus new handouts with step by step instructions. Please look for these instructions when your children come home on Wednesdays.
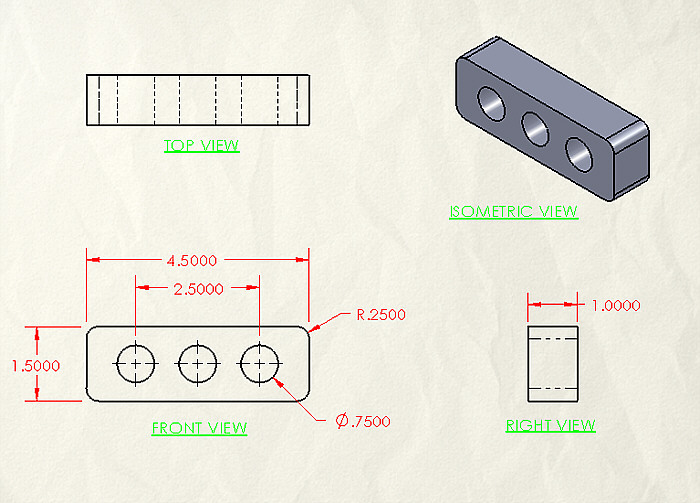
We finished our Connection Block as shown below following a step by step handout like last week. We also started our SolidWorks drawing using the Connection Block as the object on the sheet similar to the last image below. Some students finished this while the rest of the class will complete it at our next session. Andrew Sader and Jacob Pesek were very helpful in class helping me around the classroom with some of the other students. Thanks again boys.
This class was smooth with most of the students catching on with their design work and staying on task. There are still some disruptions but they are becoming less frequent. I would encourage those students that are caught up to help other students like Peyton did this week. This is a much better approach than playing games or talking. Also, the 4:30 break is getting too long and will have to be confined to a quick snack in the playground area only. We finished the Connection Block Drawing with most students printing this out and saving it as an eDrawing file. Please ask your students for these when they come home. This drawing format will be used on every design project from now on and contains typical information used in fabrication documents. The drawing model that I brought in showing how the three primary views are derived will be available for the next couple of weeks for study. This model should help in the understanding of the concepts involved in putting these documents together and why they are used. We started the Chair design and will finish up this next week. Individual design influences will be part of this project. The project will end with an eDrawing model and and a printed drawing and eDrawing drawing.  
I then demonstrated the construction of the Tire which has far fewer steps. We will work on this next week. Please note: While waiting for help, or if some are finished with the current project, I will make available the next project for students to work on. I do not encourage playing computer games while waiting. As an incentive for those that help in class, as was noted above, I will be giving out vintage baseball cards. I'll give these out one at a time when I ask someone to help another or if I catch someone helping voluntarily. These cards are from a collection spanning 20 years starting in 1985. Regarding our next project, the Tire utilizes the Revolved Boss/Base feature. This features relies on a sketched circle of a specific diameter and distance from a centerline axis. The circle is then rotated about this axis to form the Tire. After fabricating the simple Tire we will then "edit" the Tire sketch and add treads to it. See the image below: 
Check out the Student Handout link for the handout for the above design or any of the designs for this class. g
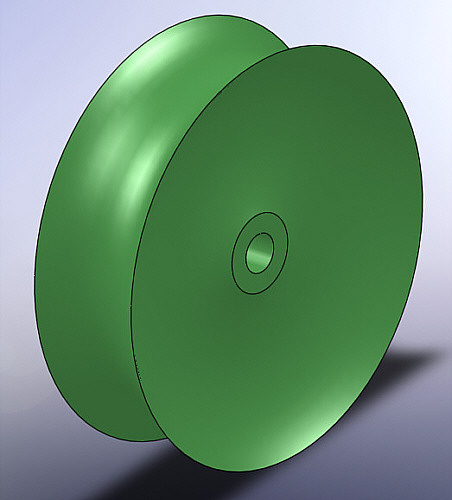
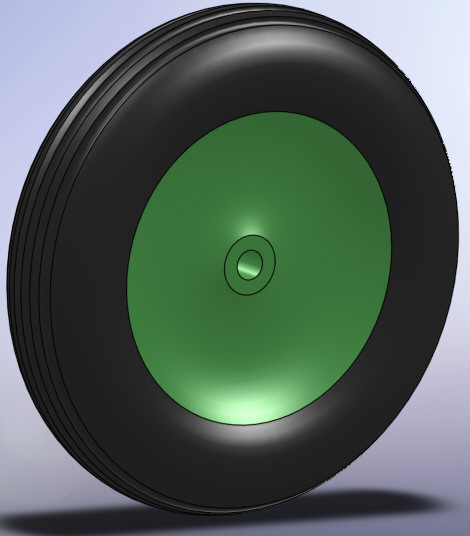
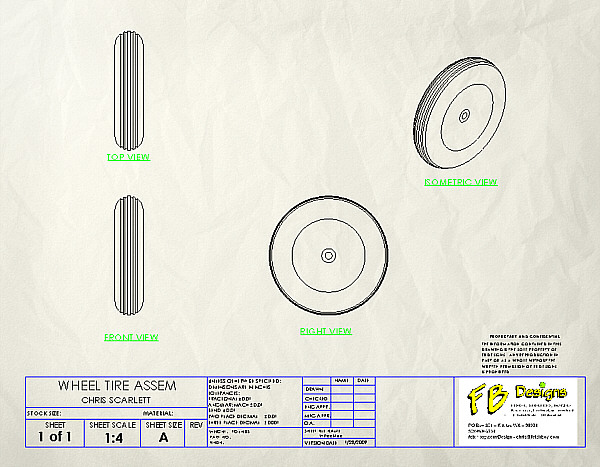
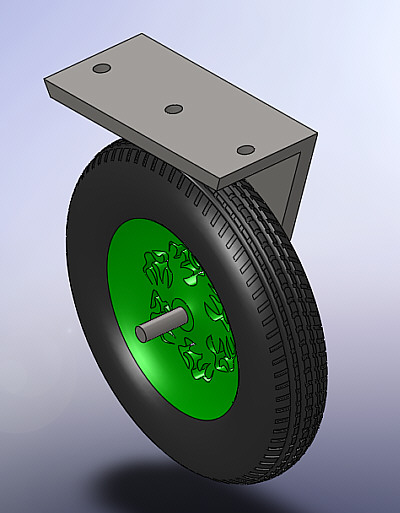
This was a great class. With a change in projects and a simpler design there was high enthusiasm and participation by most of the students. The vintage baseball card giveaway, as an incentive for participation and for helping other students, was also a hit. The baseball card incentive will continue as long as the enthusiasm holds. We started the class with the simple Tire design then modified this design by adding treads. We then worked on the Wheel as shown below. Most of the class got both done and some students printed out both models. They should also have saved it as an eDrawing file for home viewing. We will polish up any lose ends on these designs next week. We will then finish the Wheel assembly project with a Tire and Wheel drawing. Please look for these two drawings next week. For what we covered in class today see the images below. Also check out the Student Handout link for the handouts on the Tire and Wheel and for any of the other designs that we have done in this class so far.
The Wheel below, serving
as a hub for the Tire, is made in a similar manner as the Tire.
Putting the two together
in an assembly is an easy third step.
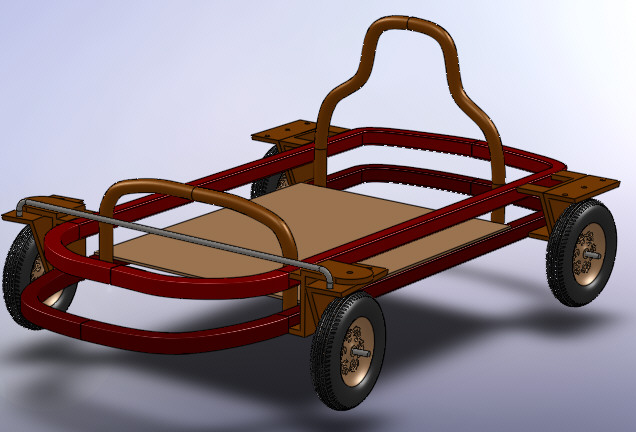
We first made modifications to the wheel adding a feature then rotating that feature around the axis of the wheel similar to the image below. This was a free form design that was intended to show rotation of the wheel when properly placed into an assembly.  We then caught the class up on the Wheel Tire Assembly. There were some students who did not have the Tire and Wheel completed so we worked on that then put them together into the assembly. Other students worked ahead on their Wheel Mount. Towards the end of the class I demonstrated the placement of a virtual motor on the wheel then put them together in the Wheel-Wheel Mount assembly. With the Wheel Mount stationary, the wheel was able to rotate around the axis. The end result of these assemblies
involving the wheel will be the creation of a vehicle that can be run on
a test track which we will accomplish over the next three or four weeks.
A developing problem is with some students not bringing their flash drives to class. This results in SolidWorks models not being available for use in class and models developed in class not being taken home. This wastes a lot of time. Please bring in your flash drives. Now that all the students in my class have the SolidWorks Student Design Kit for home use using the flash drive to carry your models with you between school and home is very important.
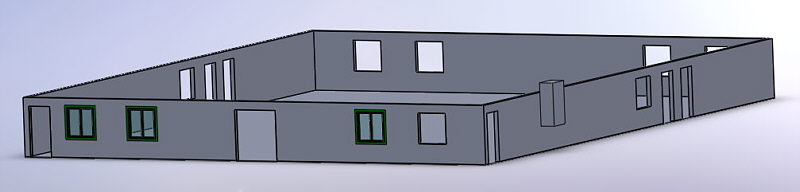
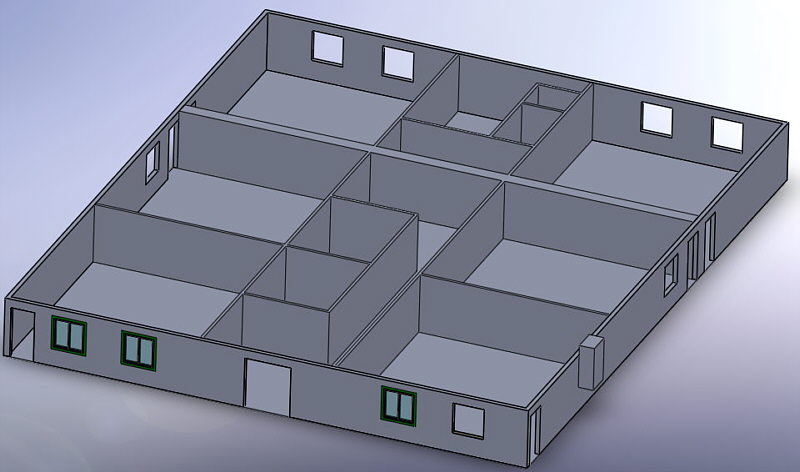
After the break we went outside and started to measure up the exterior of the building starting with the front wall (south exterior wall). Although not a great example of architecture it is a simple and basic structure that will be easy to comprehend and model in SolidWorks. As we were measuring the building we talked about what lay behind the walls and how the Mercy Building was put together.
Look for measurements on the east and north sides of the building this weekend. Part of the fun with this project is modeling some of the features found on and in the building. I stated that I will assign some of these to the students to model and share with the rest of the class for inclusion into their models. I asked the class to consider what they would like to do for their Student Design Project. We talked about some options including a bike, sports stadium, skyscraper and a drinking fountain. I also asked the students to make a decision by next week so that we can start this project soon.
With the start of our last quarter please have your Individual Design Project ideas handy for discussion for this class.
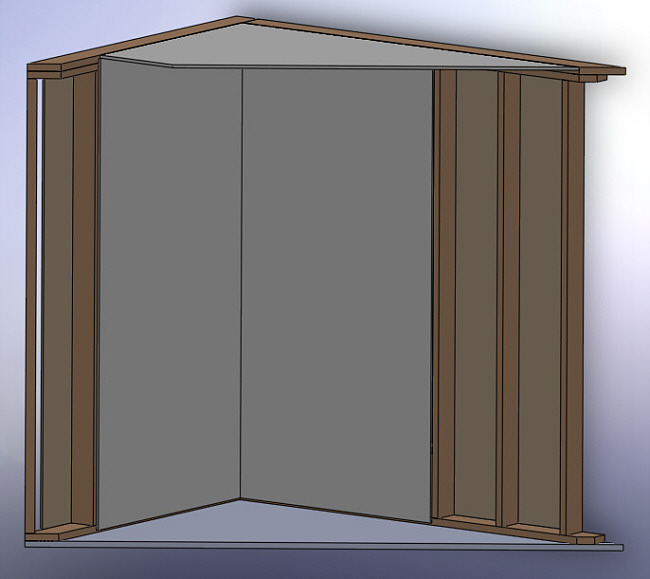
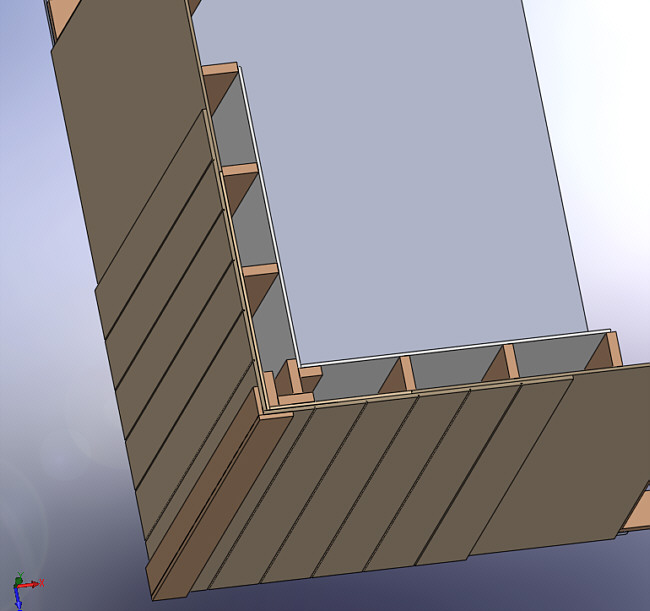
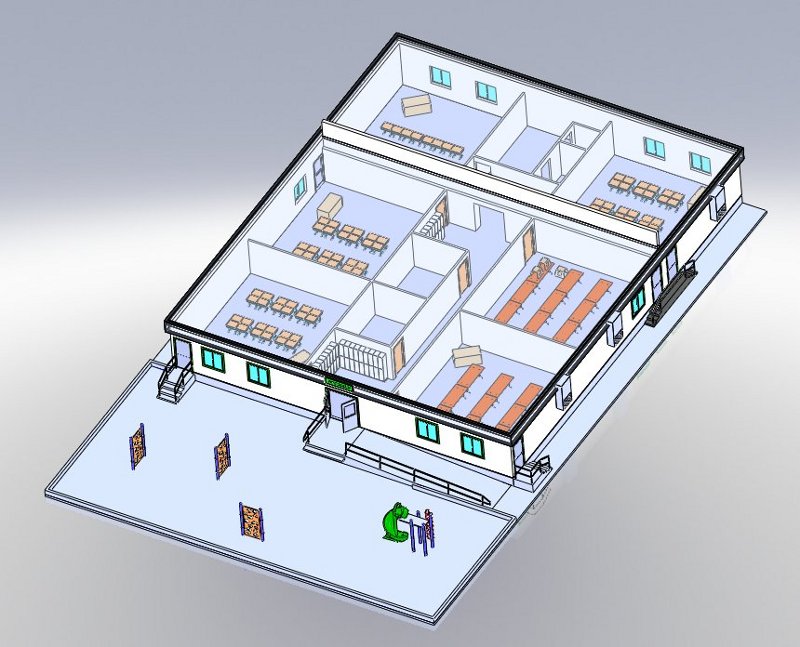
Parts of the buildng that wil be modeled by some of the students include the doors by Isaac, David will be modeling the exterior stairs, Jacob the front sign, Andrew the exterior heat pumps and Clavin some of the playground equipment. Isaac has already started the doors modeling an exterior door both with and without a window. David has started the stairs and soon will be adding the railings. More work on these projects will be will be performed this week. Below is the model of the
building that we have done so far.
|
Format:
http://www.solidworks.com For some demo videos visit
the following link:
An introduction into 3D design using SolidWorks will be the focus of this class. A student designed project of their choice, will be the goal. |